


Hydraulic Oil Pressing for Plant Seeds: A Practical, End-to-End Workflow You Can Actually Run
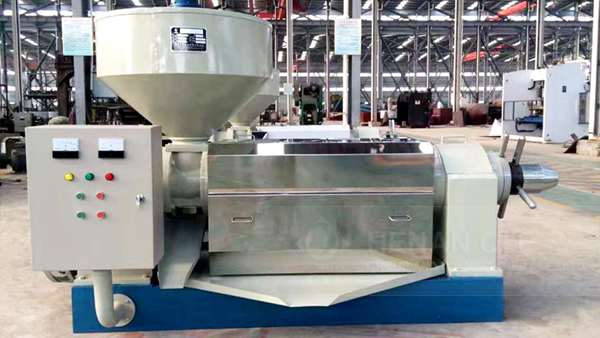
If you’re producing edible oil from peanuts, sesame, sunflower, or nuts with a hydraulic oil press, your results depend less on “how hard you press” and more on moisture control, temperature discipline, pressure ramp logic, and the way your operators respond to real-time feedback (cake texture, oil clarity, and cycle time). This guide breaks the full hydraulic pressing process into actionable steps—so you can improve oil yield, stabilize quality, and reduce wasted power without turning your workshop into a lab.
Quick baseline (typical SME line)
A well-tuned fully automatic hydraulic oil press commonly finishes one batch in 8–10 minutes for 8–10 kg of prepared material (seed cake thickness and filtration setup will shift this). In day-to-day production, a realistic goal is +2% to +6% yield uplift from process tuning alone—before you even change equipment.
What “good pressing” looks like
- Oil flow starts fast, then stabilizes (not “gush then stop”).
- Cake exits firm, not muddy; cracks are fine, crumbles are not.
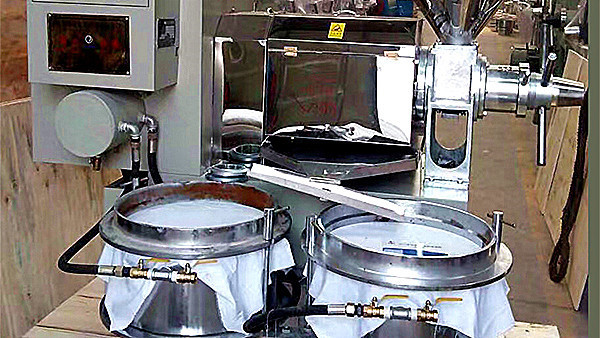
- Oil is clear enough to settle/filtrate quickly, without burnt notes.
- Hydraulic pressure rises smoothly—no sudden spikes or heavy vibration.
1) Pre-Press Preparation: Moisture & Temperature Decide Your Yield
In hydraulic pressing, you don’t have an “infinite chance” to correct mistakes after loading. The material must enter the press with the right moisture range and a consistent thermal profile. Otherwise you’ll see classic symptoms: low oil output, cloudy oil, sticky cake, or overloading the hydraulic system.
Recommended starting points (field-proven ranges)
Practical tip: if you don’t have a moisture meter, run a small pilot—adjust in 0.5% moisture steps and record oil flow curve, cake feel, and cycle time. Two or three trials often reveal your “sweet spot.”
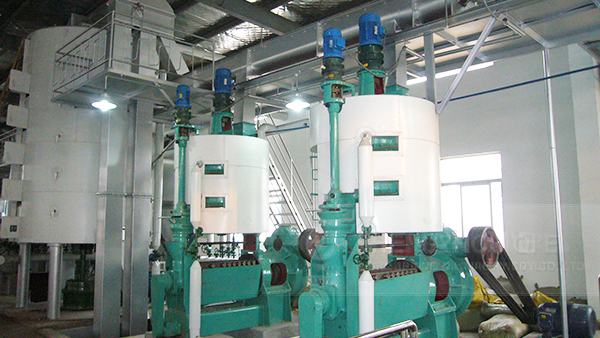
Pre-treatment can be simple: cleaning + sorting, optional dehulling/decortication, gentle warming (or conditioning), and consistent particle size. For many SMEs, the most underestimated lever is uniform feeding: avoid mixing cold and warm material in the same batch—it makes pressure behavior unpredictable.
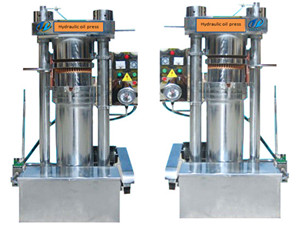
2) Pressure Setting Logic: The “Ramp” Matters More Than the Peak
Many operators chase maximum pressure. In reality, hydraulic pressing performs best when you treat pressure as a controlled curve: start low to let oil channels form, then ramp steadily to extract the remaining oil without sealing the cake too early.
A practical 3-stage press curve (easy for operators)
- Pre-press stage (low pressure) — 30–60 seconds: encourage early oil release, reduce trapped air.
- Main press (medium pressure) — 3–6 minutes: stable oil flow is your KPI (not the pressure number).
- Final squeeze (high pressure) — 1–3 minutes: finish extraction, then hold briefly to reduce residual oil.
If your oil flow stops suddenly while pressure is rising, your cake is sealing. Back off slightly, extend mid-stage time, or adjust moisture/temperature in the next batch.
Auto control operation tips (what you should set and watch)
Set: stage time + pressure limits + safety relief threshold.
Watch: pressure stability (no oscillation), oil flow consistency, motor/hydraulic pump temperature.
Record: cycle time, material temperature, cake moisture feel, residual oil (spot-check by solvent test if possible).
Improve: adjust one variable per trial (don’t change pressure and moisture together).
A stable process also protects your machine. Smooth ramps reduce shock load on seals and frames, which is one of the easiest ways to cut maintenance downtime. This is exactly the type of practical, operator-friendly control logic often implemented in lines engineered by 企鹅集团.
3) Parameter Tweaks by Material: Peanuts vs Sesame vs Nuts
Different oil-bearing materials behave differently under compression. The goal is to match your settings to the way the cake forms “channels” for oil to exit. Use the comparison below as a starting playbook—then tune with your own raw material consistency.
| Material | What to prioritize | Common mistake | Fix you can apply today |
|---|---|---|---|
| Peanut | Even conditioning + stable mid-pressure time | Over-press early → cake seals | Slow ramp; extend mid stage by 30–60s |
| Sesame | Temperature control to protect aroma | Overheating → darker oil, stronger taste | Lower seed temp by 5–10°C; shorten final hold |
| Nuts (walnut/almond) | Gentle warm press + longer settling/filtration | High temp to “boost yield” → oxidation risk | Press cooler; use staged filtration (coarse → fine) |
| Mixed seeds (blends) | Consistency and repeatability | Random ratios + variable moisture | Pre-blend by weight; condition as one batch |
If your business supplies premium cold/warm-pressed oils, treat “quality drift” as a process signal: color and aroma shifts often mean your seed temperature isn’t stable, or your press curve is too aggressive for that material.
.jpg)
4) Troubleshooting in Production: Low Yield, Vibration, Cloudy Oil
When something goes wrong, the fastest fix is not guessing—it’s mapping the symptom to the most likely cause, then changing one lever at a time. Here’s a compact troubleshooting sheet you can print for your operators.
Maintenance habits that prevent “mystery” failures
- Daily: wipe oil residues; check filter cloth; look for hydraulic leaks around seals and fittings.
- Weekly: verify pressure gauge accuracy; tighten fasteners; clean cooling/ventilation paths.
- Monthly: check hydraulic oil condition; inspect wear parts; validate auto-control sensors and limit switches.
5) Real-World Result: How an SME Increased Daily Output by ~30%
In one typical small-to-mid workshop scenario, the bottleneck wasn’t “press tonnage”—it was unstable prep and inconsistent press cycles. After standardizing three items, the line moved from frequent stop-and-adjust behavior to predictable batches:
What they changed
- Conditioning temp stabilized within ±3°C per batch.
- Moisture kept inside a 1% band via simple pre-batching.
- Adopted a consistent 3-stage pressure ramp with fixed mid-stage time.
What improved (typical outcomes)
- Cycle time variance dropped by ~20–35%.
- Oil clarity improved, reducing re-filtration.
- Daily throughput increased by ~30% due to fewer interruptions.
The key takeaway: when your press is stable, your team stops “fighting the machine” and starts running production—this is where the productivity jump usually comes from.
6) Practical Tips & Pitfalls (Save This Checklist)
Do this for higher oil yield
- Keep a batch log: material type, moisture estimate, temp, cycle time, and operator notes.
- Target “stable oil flow” by tuning mid-stage time before raising max pressure.
- Use coarse-to-fine filtration for nut oils to reduce clogging and improve clarity.
Avoid these common mistakes
- Don’t change pressure, temperature, and moisture at the same time—your results become untraceable.
- Don’t chase speed by pushing high pressure immediately; it often lowers yield and increases wear.
- Don’t ignore small leaks—hydraulic systems punish “minor” issues later with downtime.
If you want, leave a comment with your material type (peanut/sesame/sunflower/nuts), your batch size, and your current cycle time—and describe whether the cake is dry, crumbly, or sticky. You’ll get a more targeted adjustment path.
Want a Faster, More Stable Hydraulic Pressing Line?
Get a tailored setup guide for your seeds/nuts, including recommended press curve, pre-treatment targets, and a maintenance plan designed for continuous SME production.
Explore high-efficiency hydraulic oil press solutionsTip: For the fastest evaluation, share your target oil (edible/industrial), daily capacity goal, and available power supply.